DISASSEMBLE
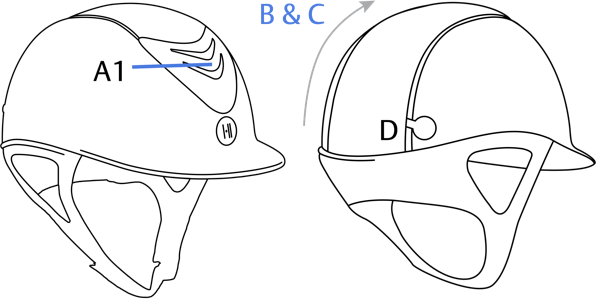
1. While holding helmet with front facing away from your body, gently pull back the front shield towards the back of the helmet by placing fingers on the hard plastic between the two mesh vents (A1).
2. Using the included One K Key (or a quarter) place in the space labeled (D) and gently twist to separate the top panel and side rail from the helmet. Back clips will now be loose.
3. Gently slide the Top Panel (B) and Side Rail (C) forward toward the front of the helmet to loosen the middle clips.
4. Remove the top panel and rail from the helmet.
*Top panel and side rail will remain connected with small clips (e) and can be separated by gently unclipping the two pieces.
ASSEMBLE
1. Carefully slide the rail (C) onto the top (B) by connecting the circled hooks (e) with rail.
2. Now carefully place the rail and top onto the helmet connecting the circled hooks (e) with the helmet (f) and (g) – starting with (f). When the hooks connect with (f) push the lower hooks gently into (g) until you hear a click sound.
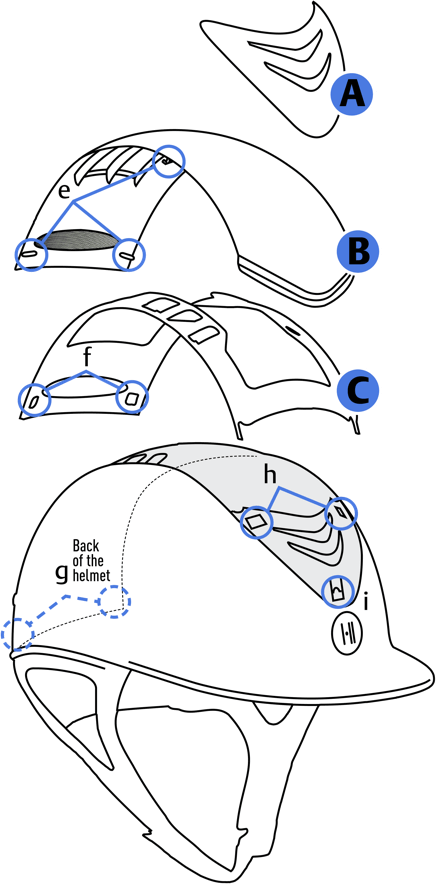
3. Now mount the front vent (A). First, slide the two upper hooks into (h) and then gently push the lower hook into place (i).
TAKE GOOD CARE OF YOUR HELMET!
Please note that the interchangeable parts for the One K CCS with MIPS are sensitive. Treat them with care. The CCS system is made to be customized on occasions, not on a daily basis.


